5 Senses: Seeing

Well, we have now made it through 2 whole weeks of school! This week we kicked off our 5 senses exploration by using our sense of sight. Since I only see each class once or twice a week, I split the 5 senses up and focus on 1 a week.

We began by playing a game I call "What's Missing?" This is a VERY easy game to set up and play and the kids really enjoy it! To prepare the game, find several different objects and put them on a tray. After students have had a chance to look at all of the objects, have them close their eyes and take one away. When they open their eyes, they have to try and remember what they saw on the tray and tell you what's missing. Here are two little cuties who asked to play the game again during workstation time. 


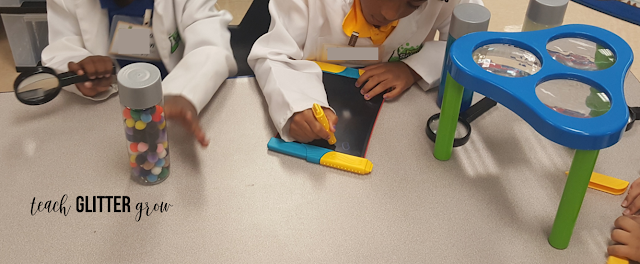
We also learn about some of the different tools scientists use when making observations with their sense of sight. Students practice looking at objects with magnifying glasses


and I give them Boogie Boards to record their work. If you have not tried these out, they are SO COOL and the kids really enjoy writing on them! You can find them here: Boogie Board Scribble 'n Play


They observed prepared slides using a microscope (you can find a newer version of the microscope here)


and learned about the tools that different kinds of scientists use on Sid the Science Kid - I want to be a scientist


Speaking of science tools, students learned how to use pipettes and practiced transferring water from one container to another.


We also practiced categorizing objects by color on the ipads


and the light table


These little scientist are off to a great start! I cannot wait to explore and investigate with them this year!




0

"Sun"sational Giveaway - Week 1


If you have been following me on Facebook, you already know that I am teaming up with an amazing group of teachers for the ENTIRE month of July to bring you awesome bargains and prizes all month long! If you are not following along yet and don't want to miss out on next week's savings and giveaways go here and click like! 

This week we are giving away 15 (that's right, FIFTEEN) $25 gift cards! We have 5 Teachers Pay Teacher cards, 5 Staples cards, and 5 Amazon cards!

If you would like to be one of the lucky 15 teachers to win an extra $25 to get ready for back to school, enter below! Good Luck!


0

How to make science is "snow" much fun! (no cold weather required)


Here in Texas, is seems like we get about 5 days of winter...total (and by winter I mean it gets below 65)! Now, we have read about snow in books, discussed it when talking about weather, and even sang about it in songs like "Frosty the Snowman" but  a majority of my students have never actually seen snow. If I could not bring them real snow, I wanted to at least let my deprived little Texans experience fake snow by incorporating it into a science lesson. It was a huge hit and an experience the students will not soon forget! 


We started the lesson off with a simple experiment about absorption.

I began by asking the students if they knew what the word "absorb" meant and while there were several guesses, nobody had a clue! I told them instead of telling them what it meant, I would show them with a science investigation.

Materials needed for the investigation:

-Water
-Paper towel
-Tray (optional but recommended)
-Sponge

First, I poured some water onto the tray and ask students where the water went. They all looked at me like, "Is this a trick question?" and of course answered on the tray!

Then, I pulled out the paper towel and asked them to hypothesize what would happen to the water when I placed the paper towel over it. Would the water move to the paper towel or would it stay on the tray?

Most students have cleaned up a mess before (or at least seen someone else do it) so a majority of them confidently guessed the water was going to go on the paper towel.

I then asked, "Where did the water go?" and they were able to explain to me that it was inside of the paper towel. I told them this is a perfect example of the word absorb! Something absorbs when it can soak up water! I then asked, "Can we get the water back out of the towel?" and they were all about to tell me if you squeezed the towel, the water would come back out!


Other questions:
  • Did the tray absorb any water?
  • Do you think the sponge will absorb water?
  • Will a (pencil, block, any non-absorbent object) absorb water?
  • How are the objects that absorbed different from the ones that did not absorb?
Now here comes the really fun part! I explained that we were going to use our new learning about absorption to make our own snow! Students helped me measure out the snow powder on a tray and we described the characteristics of the powder.
Then, students predicted what would happen if we poured water over the powder.

Just 1/8th of a cup turned from this

to this!


They were so excited to each get their own bag of "snow" to take home. 


As an extension or an independent activity, I put several objects in a muffin tin (some that absorb and some that do not) along with a pipette and a small glass of water. Students tested the objects to see which ones absorbed and which ones did not. Then, they recorded those objects on a t-chart.


If you would like to make snow with your students, you can find the snow I used by clicking the image below.


This bag makes 10 GALLONS of snow which is enough to send some home with students and have plenty left over for a sensory table or have students "finger write" in workstations or centers.  
0
Back to Top